How to Install a BathEmpire Stone Shower Tray
Posted on 18. Jan, 2012 by Rob Watson in Advice
So, last week we covered some great tips on how to choose your stunning shower tray. This week, we walk you through the steps needed to fit your BathEmpire tray.
Before you start, ensure that the shower tray is protected with cardboard or some other soft material while the work is progressing.
 Tray Fitting Finished")
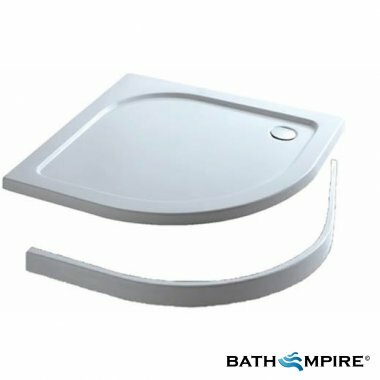
A Quadrant Shower Tray, from BathEmpire
Difficulty: Moderate/Hard
Timing: 8 hours for installation, but up to 24 hours before first use.
Tools:
- Jigsaw
- Spirit Level
- Claw Hammer
- Sealant Gun
- Tape Measure
- Adjustable pipe wrench
- Set of Screwdrivers
- Set of Chisels
- Drill
- Bucket
Step 1 – Plan
In your bathroom, decide where you want to put your shower enclosure tray, and mark in pencil the outline on the floor and walls. If there is an existing floor covering such as carpet or lino, ensure that this is removed. Also ensure that all walls surrounding the tray are in good condition, and free of mould or other structural damage.
Step 1a – Make an Access Hatch (Only for Level or Flush Installation)
If you choose to install the tray flush with the ground, or as a raised tray, you will not have the option to move it; therefore, this stage presents an ideal opportunity to create an access hatch.
This hatch is created so that, should there be any problem in future with the drainage of water away from the shower tray, all fittings can be checked with minimal disruption.
Choose a location near to the waste outlet, and cut a hatch with the jigsaw large enough so the main waste can be comfortably accessed.
Step 2 – Fix the Waste
The Fast Flow Waste can be swivelled in any direction, so you can position the outlet in the best possible way. When the waste outlet is attached, ensure the seal is completely watertight using silicone sealant and/or industrial tape where applicable. Remember to test the fitting is watertight at this stage!
You must also make sure that there is a fall in the waste system (a slight downward angle) for water to flow away effectively.
 Screw Leg Into Tray")
Screw the leg securely to the BathEmpire EasyPlumb Tray
Step 3 – Fix the Tray
Firstly, turn the tray over onto a covered flat surface (so it does not get scratched) and screw the legs into place. Once you are happy that these are secure, place against the desired location; using a spirit level, adjust the height of the legs so that the tray remains completely flat.
The tray can be fixed into place using a firm cement mix (consisting of four parts industrial sand to one part cement).
Step 4 – Add the Side Panel
 Panel Secure")
Using the clips, secure the panel into place.
Once the tray and the major fixtures are in place, all that is left to do is attach the side panel to cover the internal fittings. Be aware that if the floor or walls are angled, the gaps will have to be filled using silicone sealant.
Step 5 – Add the Sealant
It is recommended to tile the wall after the installation of the tray to provide for a water tight joint. If you cannot do this, then ensure that a silicone sealer is applied not only to the edges where the tray meets the tiles, but also to seal the tray to the floor when finished.
Ensure to leave the mortar to completely dry for at least 24 hours before first use.
Note: If at any stage you are unsure about how to proceed, we recommend that you contact a qualified plumber for expert advice.
If you would like further advice in choosing your ideal bathroom, feel free to contact the BathEmpire team.
-
 How did this win America's Best Restroom?
-
 Using colour theory in your bathroom
-
 Are you looking for a new bathroom cabinet?
-
 5 reasons why chrome is right for your bathroom
-
 Want to create a dramatic bathroom?
-
 Could a beautiful bathroom help your home to sell?
-
 An all-white bathroom doesn't have to be boring... we show you how
-
 3 reasons electric towel rails beat the alternatives
-
 Are these the most Bizarre Bathrooms in the world?
-
 Can you help America find their best bathroom?
-
Rob Watson: And a Merry Christmas to you too Matt!...
-
mattymays: hi bathempire.com-ers xmas greetings to all...
-
-
Sharon: Hi ! I find your spaces very inspirational example...
-
Charlotte Laing: Hi Sharon, Wow, that sounds like a fantastic proj...