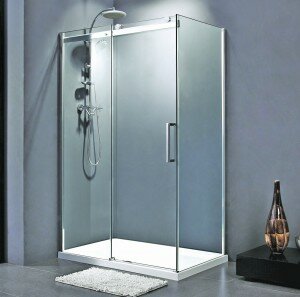
Episode 3: How to Install an Enclosure
Posted on 04. Apr, 2012 by Nitin in Advice
In this episode, we cover how to actually install a shower enclosure. If you missed our previous posts, catch up and discover what shower enclosure styles you would be most suited to, and take note of our key preparation tips to ensure that the actual installation is a breeze.
Preparation:
So, you should have your shower tray fitted completely. It should be installed flush with the floor and wall, fully sealed, and the waste should drain water away
without issue. If required, your concealed shower can also be installed at this stage, as you can have better access to the cavity behind the plaster wall. The walls should be tiled, or if you haven’t chosen tiling, then cladded using an appropriate waterproof material.
Step 1: Fit the Wall Edge Compensators
Place the wall edge compensators against the wall, and mark where you need to drill the two screws into the metal.
Next, place the wall channels on the tray, and using a spirit level, mark where you would need to drill the tile, avoiding tile edges.
Complete all drilling, and affix the compensators firmly to the wall.
Step 2: Assembly
The enclosure doors come fully assembled, so only require the handles to be screwed into the glass.
Most enclosures are reversible, but there are some styles such as the sliding shower enclosures, in which the placement of the door is fixed for either left or right hand opening. In these cases, take care to install the handles on the correct side of the glass!
Step 3: Simply Slot the Enclosure Together
Fit all the glass panels and doors into place. The side edge compensators allow you to align the doors to be perfectly straight, as the side walls may not form a 90 degree angle with the floor.
Once you’ve checked and are happy that all the panels are aligned evenly, slot and screw into place, starting at the bottom.
Stage 4: Complete the Finishing Touches
You can now add chrome dome caps to hide the screws, and attach the central covering to the top of the enclosure.
Stage 5: Silicone Sealant
Using a good quality silicone sealant, all that is left to do is to seal the edge of the enclosure; if you can, try to maintain an unbroken flow of sealant.

