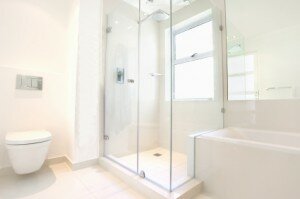
Episode 2: Shower Enclosures – Great Installation Tips
Posted on 28. Mar, 2012 by Nitin in Advice
Having read our previous entries, you should now be well on your way to having chosen your shower enclosure. Hinged, bi-fold, or quadrant…whatever your style, you now know the design most suited for you.
But before you storm ahead to install your shower enclosure, there may be some preparation that you need to undertake, to make sure that installing the final enclosure is a breeze.
Prevent Leaks
The first item that must be installed correctly is the shower tray, as this is the base upon which the shower enclosure will rest.
Have you ever known a soggy downstairs ceiling and been confused as to the cause of the problem? Well, the most common cause of such an issue is a leak originating from the shower tray. An incorrectly installed shower tray will ultimately result in leaks. Most modern stone trays feature a core stone layer which is then capped with a layer of white acrylic. These trays are significantly stronger than previous incarnations which featured a fibreglass resin core.
Wear and tear is often the reason that the once pristine seals break down or split. The easiest way to replace the sealant is to purchase a silicone sealant remover, which would be available from most DIY stores. This will take away the bulk of the old sealant, and simply leave you to replace, preferably using a single bead of sealant.
If you want further details, you can check out our shower tray installation guide, dedicated to installing BathEmpire shower trays.
Ensure the Tray is Level
Over time, the shower tray can subside and sit at an angle, so take a spirit level and check the tray. It is better to get a level tray now to ensure that the enclosure will stand straight.
Also take the opportunity to ensure that all waste fittings are correctly screwed in and fully watertight. Also check that a slight angle remains in the shower waste so the water will flow away without issue.
Check The Tiling
Once the tray is secure, feel free to tile the remaining walls; it is always advisable to tile after the installation of the tray. If you are keeping the existing tiles, then check for holes in the grout. Water and steam can penetrate these areas, and cause damp problems to the plaster wall behind. Not only would such damage warrant a large amount money to fix, but also your health will be harmed when breathing in the mould spores caused by the humid conditions. Do not hesitate to re-grout your tiles; if you need more information, see our blog post on how to re-grout your tiles.

